Author: Ash Nallawalla

About Ash Nallawalla

Ash Nallawalla is a consultant enterprise SEO with a long background in large companies with complex websites. He is a published author of several books and thousands of magazine articles.

The Mythical Bombay Back Bay Station

Reading Time: 3 minutes

I administer an unlisted Facebook group known as “Bombay, I Remember”. It is a group for reminiscences of its members in the pre-1995 Bombay (when the city was renamed to Mumbai), but nowadays it is kept alive with a lot of historic content about Bombay. Several posts have covered the railway line of the former Bombay, Baroda and Central India (BB&CI) line, particularly the stations at the start of the line.

I have not found any old document that mentions this “Bombay Back Bay” station.

The Bombay Builder

Today, I found an archive of the Bombay Builder covering 1867 at the Asiatic Library’s online archive known as Granth Sanjeevani. The specific page below is dated 5 April 1867. Note that date.
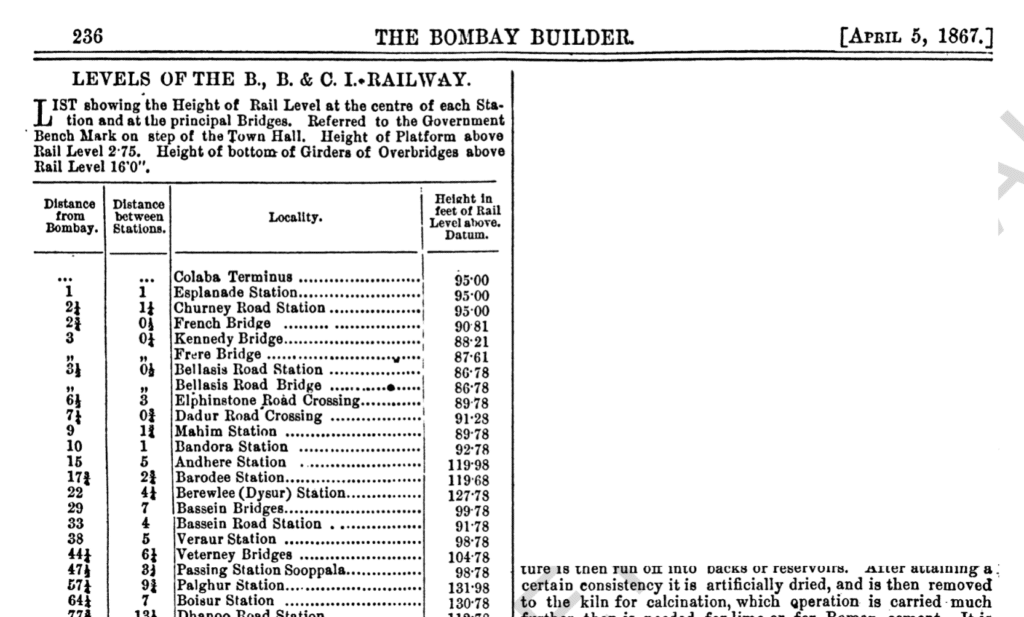
Note the stations in the Locality column.

Two things stood out for me. The terminus at Colaba was there in April 1867. The second station is called Esplanade Station. This is an added mystery, as the Esplanade in those days was too far from this train line to deserve the title. As this is a journal for engineers, they were interested in girders and overbridges, in addition to stations.

Western Railway

The Western Railway (WR) has been the name of the former BB&CI since 1951, so it should know its own history. Its website is very flaky, so here is a screenshot of its About Us > Milestones page.

WR milestones.
WR milestones.

Notice that the WR timeline says the line to Colaba was extended in 1873. How can the earlier reference in the Bombay Builder mention a Colaba Terminus before 5 April 1867? The entry for 1867 mentions the start of a local service between Back Bay and Virar (then spelt Veraur) on 12 April 1867.

I decided to check the newspapers of the day, as scanned by Granth Sanjeevani.
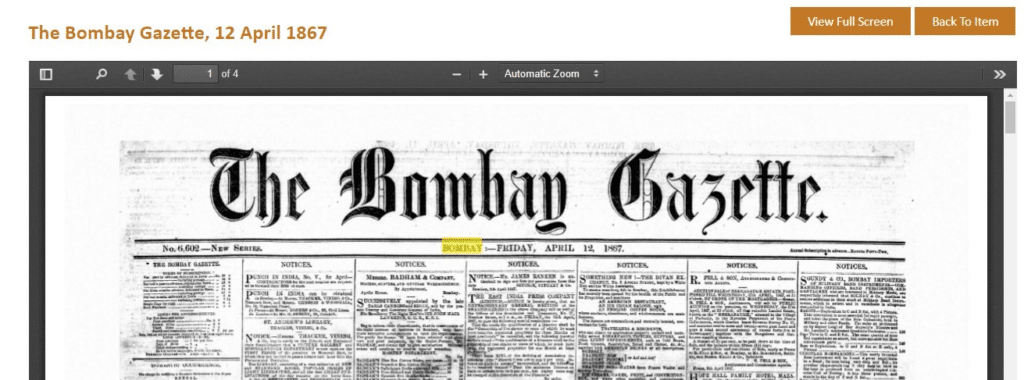
The Bombay Gazette of 12 April 1867.

I checked the date of this new service, the next day and a few days on either side. Not a single mention. Surely a service covering the length of Bombay was worth a mention? BB&CI used to advertise almost daily, but no mention of a new service?

The Wikipedia Entry

The Wikipedia entry for Churchgate railway station says:

“By 1867, a track along the foreshore, further than Grant Road station was constructed, up to the station named as “Bombay Backbay” near Marine Lines. On 12 April 1867, the first suburban train was started with one train each way from Virar to Bombay Back Bay. The stations were then named, “Viraur, Neela, Bassein, Panje, Borewla, Pahadee, Andaru, Santa Cruz, Bandora, Mahim, Dadur, Grant Road and Bombay Backbay”. In year 1870, Churchgate was first time mentioned as the station. The line further extended towards Colaba in 1872, and goods shed was built there.”

The spellings in those days were quite fluid, so they are a little different from the ones in the Bombay Builder. The unknown Wikipedia contributor has a different date (1872) for the extension of the line to Colaba compared to the WR date of 1873. They mention this mythical “Backbay” (actually two words, Back Bay) station as being “near Marine Lines.

A letter to the editor

The Times of India, 2 September 1868
Letter to the Editor, The Times of India, 2 September 1868

Where does this leave me? I have not found any old document that mentions this Back Bay station. Until I do so, I will treat Back Bay Station as a colloquial reference to Church Gate Station (whose name slowly became one word). If you go to that Wikipedia page for Church Gate Station, you will see that it was opened in 1867!
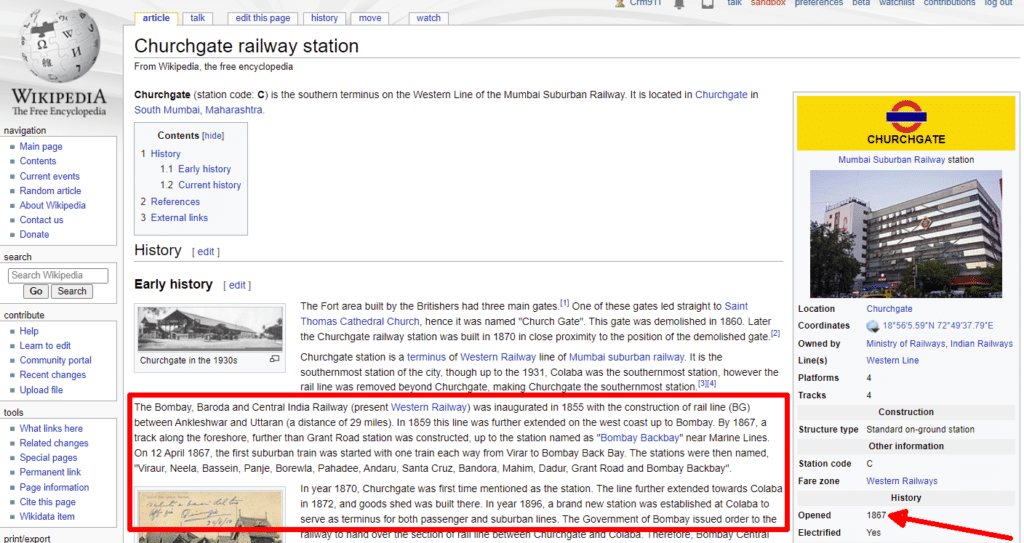
Wikipedia entry for Church Gate station.

Here is another modern reference to Church Gate being called Back Bay.

Church Gate being called "Bombay Backbay".
Church Gate being called “Bombay Backbay”.

As for the other mystery of an Esplanade Station between Colaba Terminus and Churnee Road (now spelt Charni Road), I think it too is a colloquial reference. Perhaps the engineer who wrote that entry was a brief visitor and wrote it up when back in the UK?

Colaba Station Dates

I found this document “Things of India Made Plain, or A Journalist’s Retrospect” by W Martin Wood in the more navigable archive – the Wayback Machine. It mentions in an entry dated 29 September 1873 that the Colaba station was well towards completion that year, after a period of seven years, suggesting that it was started in 1866.
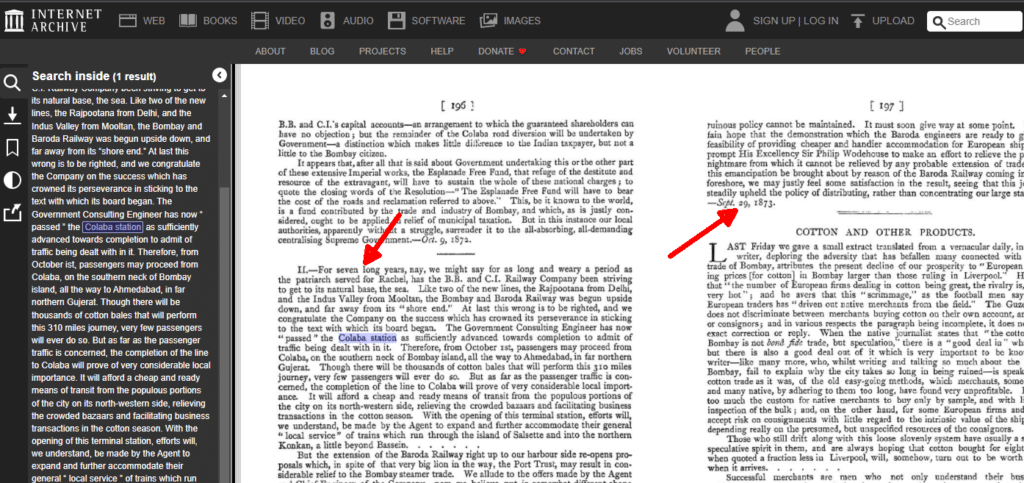
Colaba station took 7 years to be built.

The previous page has an entry dated 9 October 1872, mentioning the procurement of the land for the station.

1872 entry.
1872 entry.

Those words from 1872 suggest that there were railway tracks to Colaba in 1867 (also mentioned by the Bombay Builder), but the grand station was not completed until seven years later. Those tracks carried the cotton to the docks there during the US Civil War and to the Cotton Green. There is a plaque at Bombay Central station that acknowledges a Colaba Causeway station built in 1870 and another reference that the line used to go to Arthur Bunder.
Control Malahit DSP2 with SDRUno-Extio and Omni-Rig

Reading Time: 2 minutes

You might want to try connecting your Windows PC with your Malahit DSP2 receiver using SDRUno-Extio (not the regular SDRUno, but the other one you will find that was installed at the same time) and Omni-Rig 1.9. Now why would you want to do this? One reason is that you are a geek like me and want to see if it works and is worth the trouble.

What You Need

In addition to the receiver, you need a USB cable, but as a geek you have already hooked that up to update your firmware. You need Omni-Rig 1.9 (other versions might work, but you need one that shows the TS-480.)

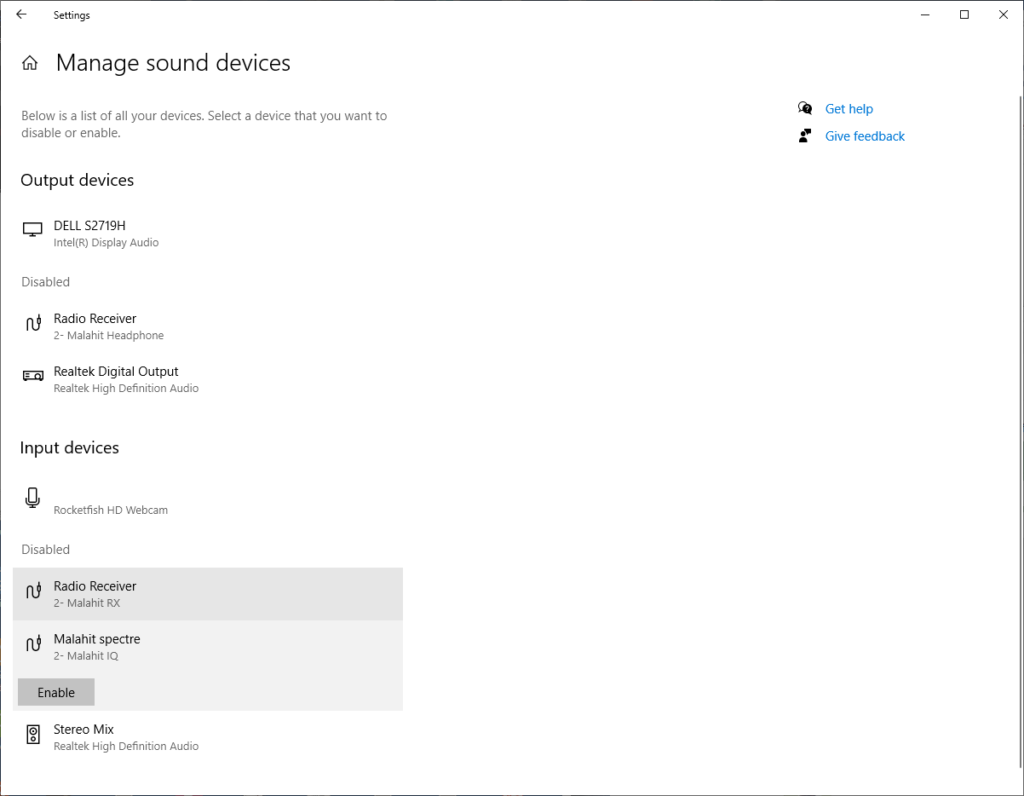
Manage sound settings
Manage Sound Settings

Once you have enabled the two disabled items above, you should see the “spectre” option in SDRUno-Extio, but after you have set up Omni-Rig correctly.

Omni-Rig settings
Omni-Rig settings

The Rig type should be TS-480 and the Port is the one you see in Control Panel Device Manager. When you unplug the receiver, a COM port will disappear and will return when you plug it in – that is your Malahit’s COM port – COM 7 in my case.

Find the COM port used by the Malahit.

The baud rate should be the same as the CAT settings in SDRUno (The Sett. button in the SDRUno Rx Control).

Start SDRUno-Extio. A tiny window opens up.

Start SDRUno-Extio

Click Sett. to open the main settings. Choose Malahit spectre as the WME Input Device.

Select Malahit spectre.

Click RX in the main window to open a receiver instance. Note the three buttons at the top: RSYN1, MCTR and TCTR. The labels are white text.

A receiver instance is opened.

Click each of the three buttons: RSYN1, MCTR and TCTR. They will turn to orange text.

The three buttons are clicked.

Click Sett. and go to the CAT tab. Choose the Malahit’s COM port and baud rate.

Set COM and Baud Rate.

I am not sure why the status says “Not connected” but once you click Play on the main window, the PC speaker should come to life and relay the Malahit’s audio and mirror the frequency in SDRUno.

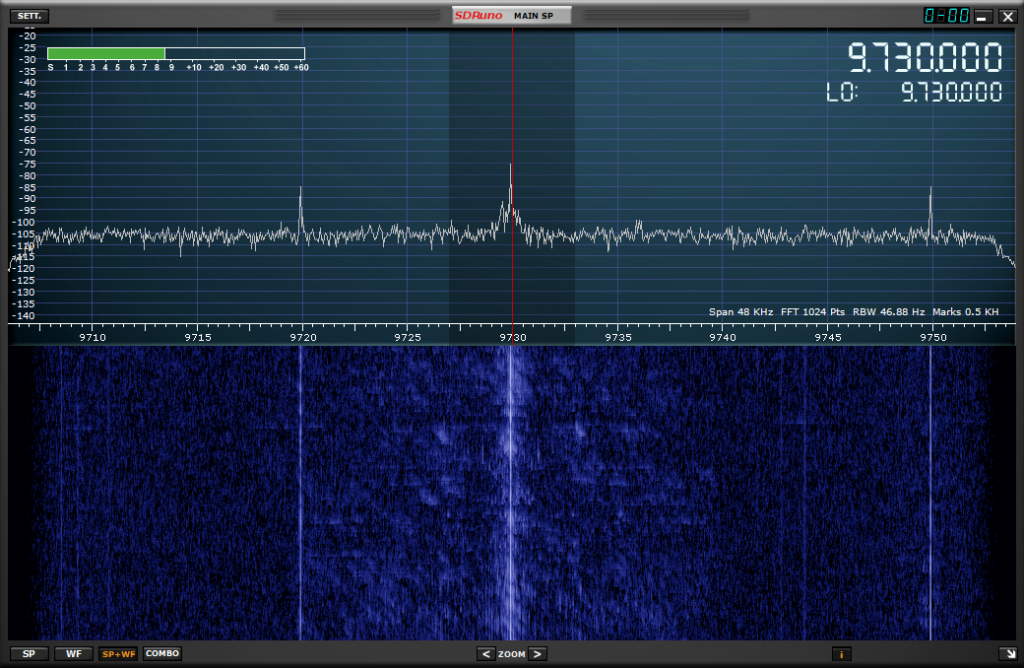
Click SP1 in the main window to display the spectrum and waterfall in SDRUno-Extio.

Spectrum and Waterfall in SDRUno.

You can now control the receiver from your PC. Enjoy!

Thanks to Alexander DL5VZ for his help in clarifying these steps.

Epson EcoTank ET-3800 Setup is Quirky

Reading Time: 4 minutes

My previous Epson printer was dying and its ink cartridges were getting expensive, so I had my eye on the Epson EcoTank printers. It took me some compromises to settle on the ET-3800. Ideally, I would have liked an A3 scanner with higher resolution. I also wanted a printer that was in stock locally. I had to pick this A4 model, realising that I don’t really need to print on A3 paper and for scanning large pages I have just received a CZUR scanner, yet to be opened. This is not a review, but just a report on the confusing setup process of this printer.

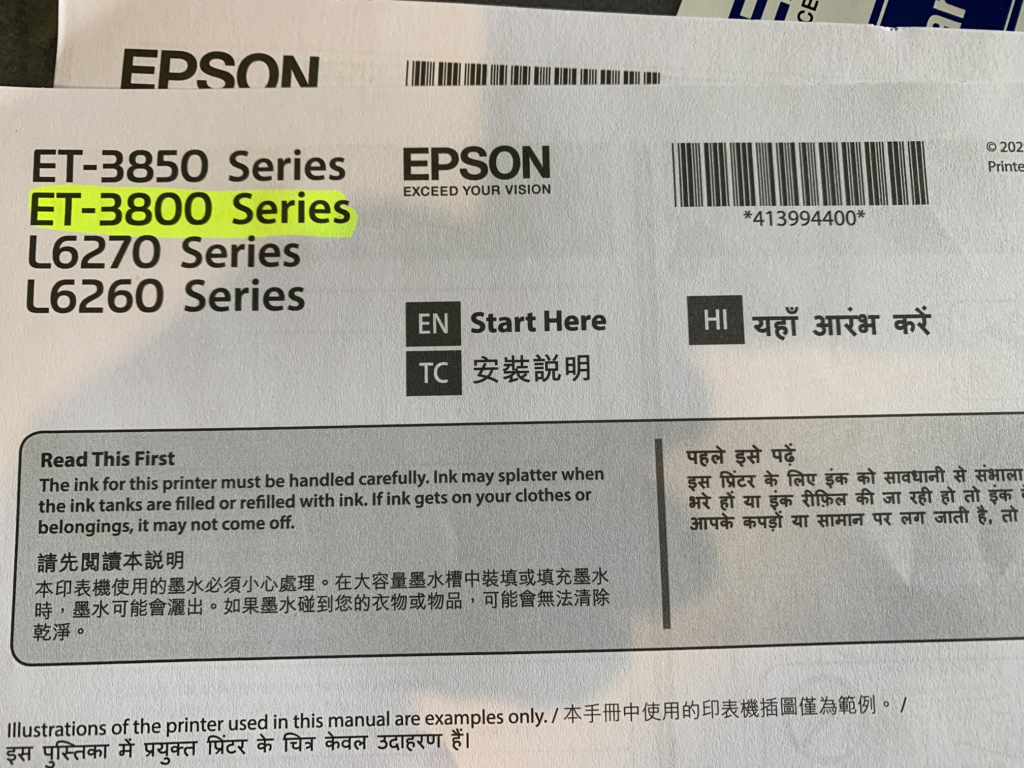
instruction sheet

The setup instructions are on a large folded sheet in English, Hindi and Chinese. This model works with the Epson Smart Panel app, so some of the setting up (but not all) is done with the app and not the tiny screen.

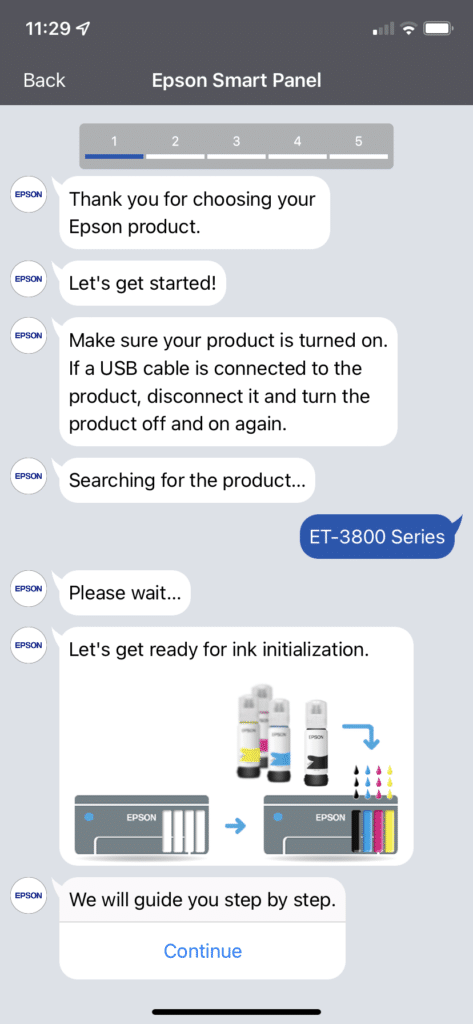
I connected it to power and loaded paper. I started the Smart Panel App.

app

My phone’s Bluetooth found the printer.

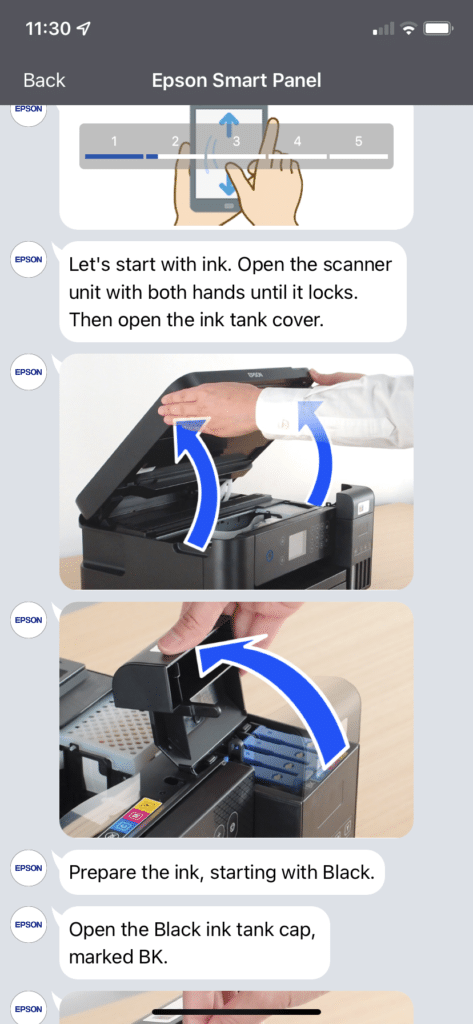
app instructions

I was looking forward to the ink loading process and opened the black ink bottle. You just turn it over and it does not leak – when it touches the receptor in the printer, the ink begins to flow. There is some ink left in the bottle, so don’t discard it just yet.

ink bottle

Do the setup in a quiet room, so you can hear the gurgling of the ink as it empties into the tank. If you are doing something else on the side while the ink is filling up and are not paying attention (like me) and nearly pour the next bottle into the slot that you just filled, relax. The printer is Ash-proof (that’s me). The guides at the top of the bottles are all different, so you cannot insert the wrong colour in the wrong slot!

bottle guides

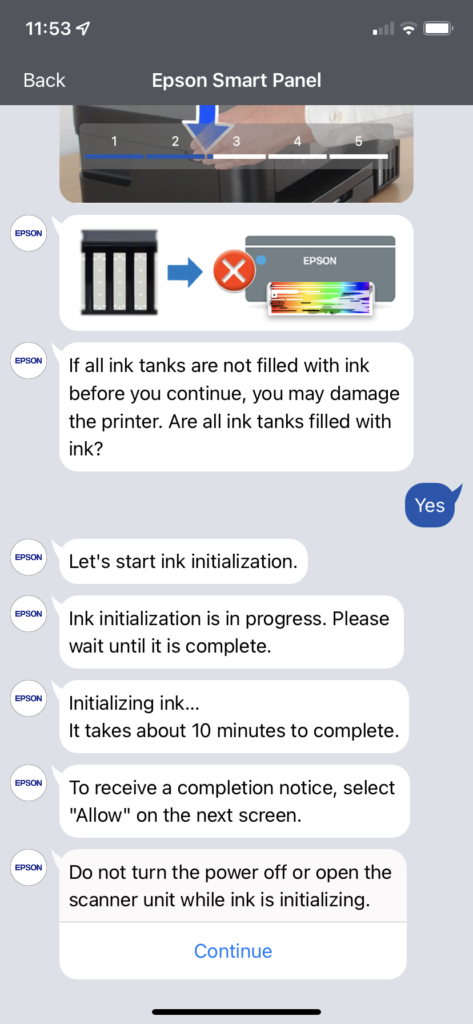
When all four ink tanks are filled, the app asks you to proceed with ink initialisation. Okay.

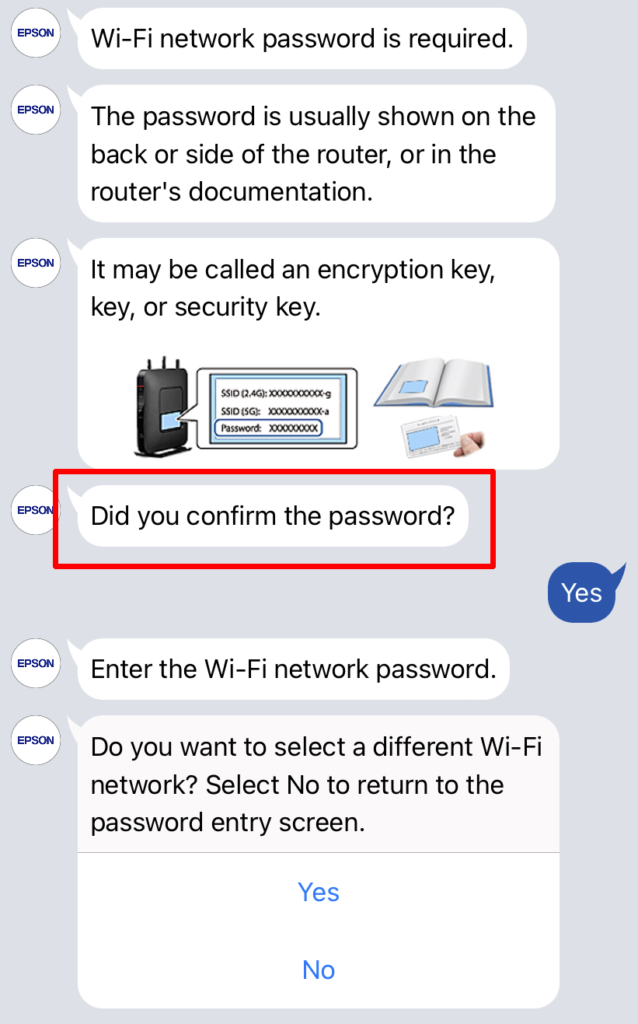
Next, I tried to connect the printer to Wi-Fi. The previous Epson printer was on Wi-Fi. This kept failing, because the English instruction, “Did you confirm the password?” implied I had already done that. As you can see, I had not even entered any password. Never got the chance. Eventually I replied “Yes”.

wi-fi setup

But I did not get a chance to enter it. This was an endless loop. What’s going on? Nothing doing. I could not get past this point.

I managed to install the Wi-Fi settings from the front panel, but it was not going to be of help.

Setting Up the Software

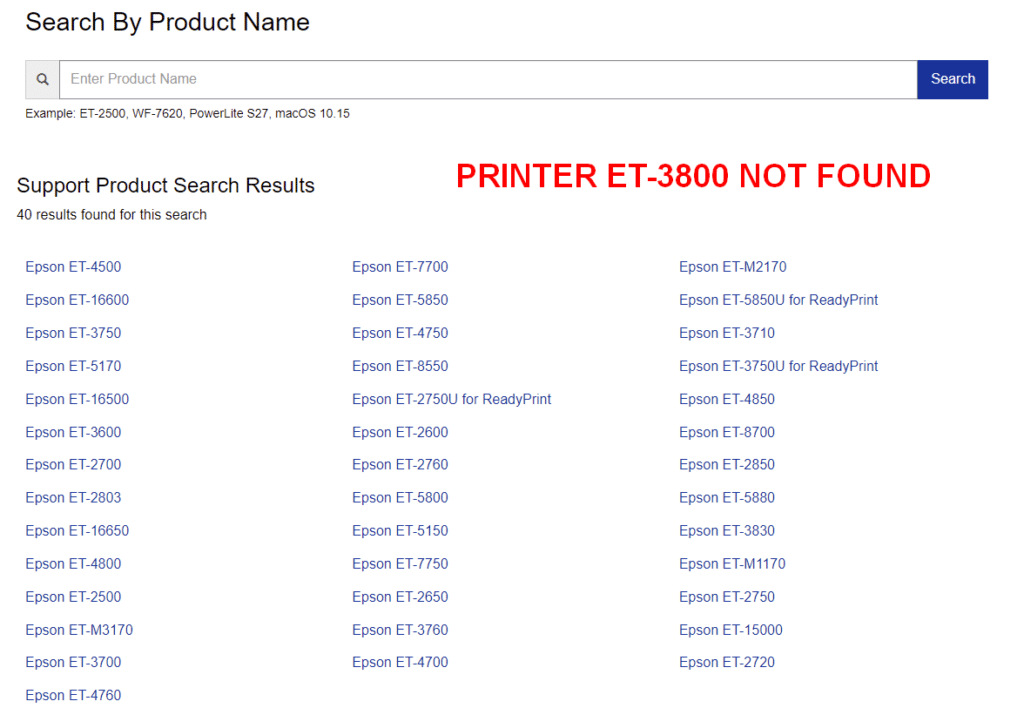
So I thought I’d try the URL printed on the instruction sheet. Strangely, the choices of the installation country were just USA, Canada or Asia. I picked USA, as Australia is not in the choices.

https://epson.com/supportsearch?searchText=ET-3800&support_keyword=

I could not find the ET-3800 – maybe it is not sold in the US. You have to ask why does Epson need to make so many models each year, but they are not telling.

printer selection menu

So I used the DVD that comes with the printer. It has all the software and drivers you need. This is fine if you have a DVD drive on your computer. Luckily, I have a removable DVD drive that I can use to set it up on my laptop.

DVD setup

After initialisation, I selected “Print Test Page”. Nothing happened. I found that had to complete steps on the printer front panel to finish alignment etc. Then a test page came out. The screen guidance was not clear, but I think I got it. I had to do head maintenance and print head alignment again, all from the front panel.

print head alignment

The instructions for choosing the best print sample are not the clearest. Take a look. I worked out that you have to look at the numbers on the printed sheets and use the +/- buttons to pick the number you like, then you proceed to the next step. Perhaps the steps should be labelled A, B, C and D?

print head alignment.

The front panel mentioned a firmware update and showed two choices – Dismiss and Close? At this point I did not know if this screen was a touch panel – it is not. You have to push the buttons to interact with that screen.

Firmware option

Poor Wi-Fi Sensitivity

Now, this is where the fun really began. I had set up Wi-Fi with my home network, but I could not download the firmware. The printer had lost the connection. I live in a steel-frame house that has poor phone reception inside and it also seems to hamper Wi-Fi signals. Although the previous Epson XP-420 printer had no problem with Wi-Fi, the ET-3800 was just borderline and had allowed itself to be set up, but could not hold the connection. Thankfully, I had a spare Ethernet port on my extender (my home office has an Ethernet run to the modem/router) and was finally able to update the firmware but adding an Ethernet cable – the last spare I had.

Installing firmware update

Registration Madness

The trouble with this disjointed installation process is that the DVD-based setup app invites you to register the printer online and that is straightforward. The form tried to get me to enter my phone number as mandatory when I tried to edit my existing profile. Why would they need my phone number when they have my address and email?

Finally, you get this screen.

After registration

Looks simple, right? Remember, I have just installed a printer and its process sent me here to register it with its serial number, but why show me a setup option as well as a file download link? I checked them out, downloaded whatever I could, being pretty sure I already installed everything from the DVD. OK, they are allowing for someone who registers before opening the box and has not been through the installation process. Perhaps, given so many dozens of models they make, the poor product managers don’t have time to figure this out.

So far so good. Perhaps a review will follow?

Mastodon