The AnyTone AT-6666 is a 10-metre band mobile amateur radio with roots in CB. You can open up the radio to include the entire range 25 MHz to 31 MHz. That has no appeal to me, so I won’t go there. One of my reasons for buying this radio is to focus entirely on the 10-metre band as we approach the sunspot peak next year. I had been using the radio for a few months, but had not bothered to learn how to enable the repeater split for the few 10 m FM repeaters.
Table of Contents
Documentation
For reasons that don’t make business sense, the slim, printed manual for the AT-6666 is a quick-reference guide, rather than its title as a “User’s Guide”. (I was once a Technical Editor at Unisys). There is a reference to repeater offsets, but that’s it. There is no mention of software or how to program the radio from a PC.
Software
I read a few 10-metre discussion groups and found out that free software for this radio is made by an unidentified source, as there is no mention of AnyTone on it. It’s called QPS6666. You need a special serial cable, which looks like a USB cable. I had forgotten that I ordered this cable with the radio; yet, a few days ago, I ordered another cable!
Connecting the Cable
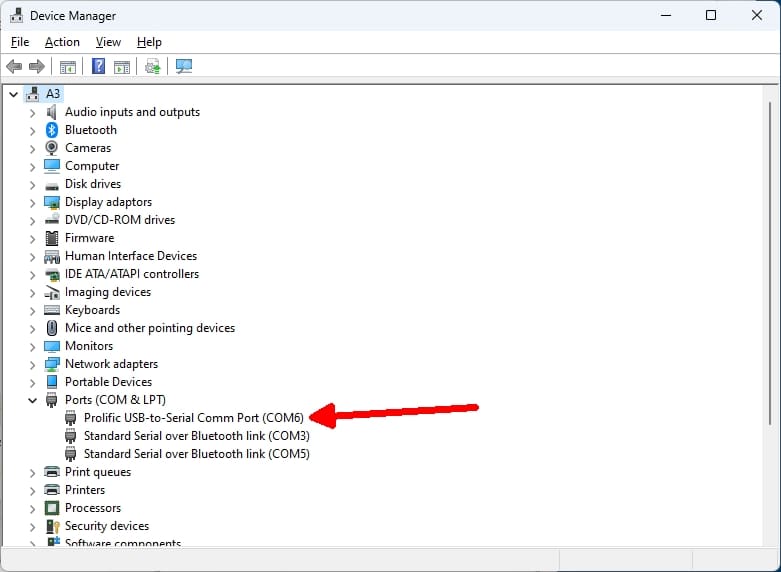
The USB serial cable goes from the Windows PC to the back of the radio, where a mini-USB serial socket is available. A Prolific driver is required for this cable to work, as the regular Windows 11 serial port driver does not work with it. As this step has an element of chicken-and-egg to it, I will continue this point a little later. Upon installation of the software, the PC showed a new COM6 (the number might differ on your PC), and the software could see the radio (Setup > Communication Port > COM6) just fine.

QPS6666 Software
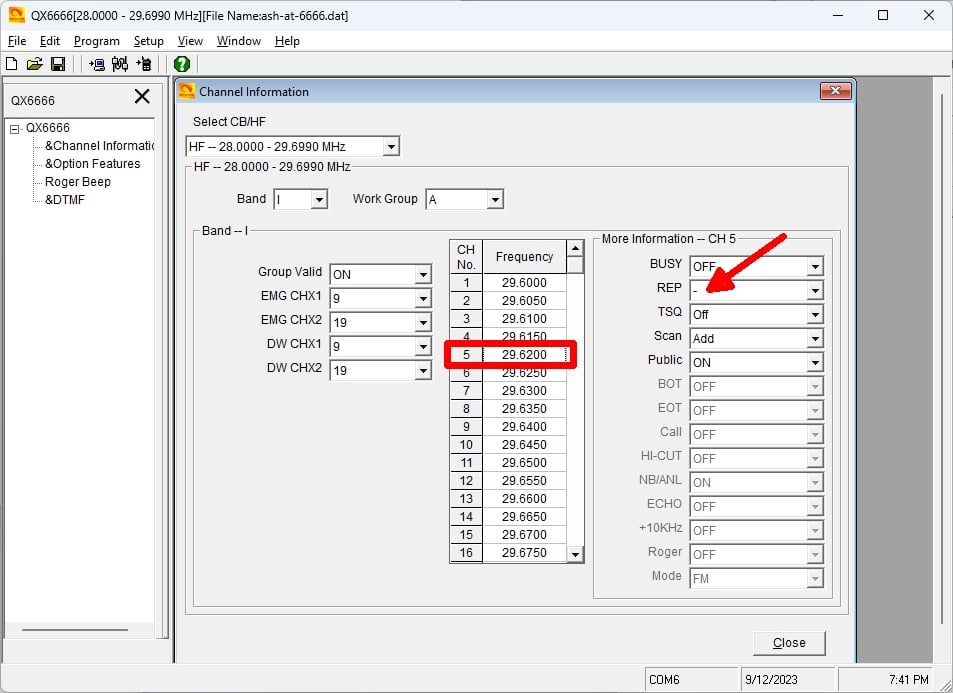
This software for the AT-6666 can be downloaded from a few places. It’s easy to install. To my knowledge, the software does not come with any manual, so I had to figure it out with trial and error. My goal was to put repeater offsets, which are minus 100 kHz, on the 10-metre band. The reception frequencies for the FM part of the band are pre-programmed in Band I. See the screenshot below. I picked one of the repeater frequencies at Channel 5. I changed the REP value from OFF to the minus sign. I did it to all the other repeater frequencies.

Prolific Driver
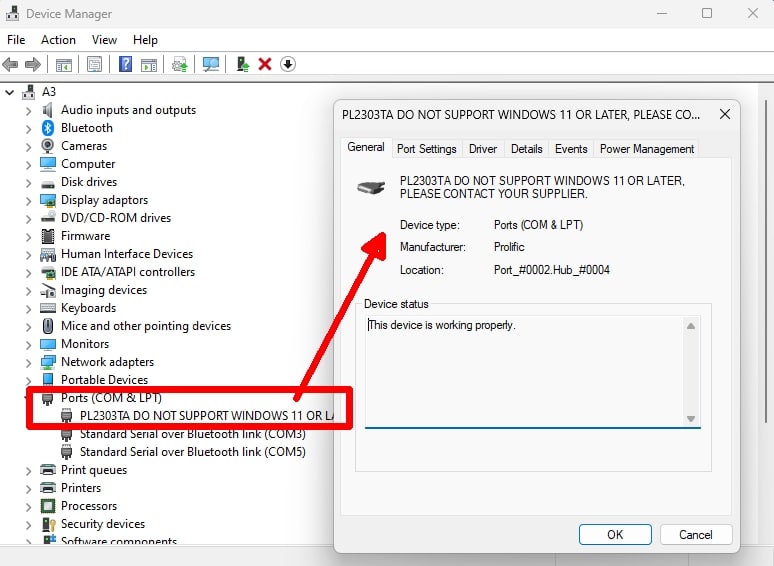
The next day, the software could no longer see the radio, and Control Panel had lost COM6. See the screenshot below. I went to look for a source for the Prolific driver. I found this article, which is linked to the file and provides instructions, so I won’t repeat them here. I don’t know why I did not need to install this driver when I installed the QX6666 software. I have had this “lost Prolific driver” issue with another ham-radio program, and it seems to be Windows Update (10 or 11) that overwrites it. The good news is that once the radio has been programmed, you won’t need to use the software for some time. Reinstalling the driver is easy, and you need to reboot the PC afterwards.

Repeater Operation
Initially, I could not get the rig to work in repeater split mode. It was in VFO mode, and I had to press the FRQ button to get it into Channel mode. Be sure to keep pressing the Band button until it shows the I band in the display. For each channel that you designated as a negative offset, you will see “REP” against it. See the photo below. When you key the mike, the radio will transmit 100 kHz below the channel receive frequency. Enjoy using the 10-metre repeaters when the band opens.


